From HEXONET Wiki
(Created page with "{{Sidebar}} __NOTOC__ == Configuring Default Nameservers in the Control Panel == Every domain registration requires a set of nameservers to be assigned to the domain name. ...") |
|||
| Line 1: | Line 1: | ||
| − | {{Sidebar}} | + | {{Sidebar}}__NOTOC__ |
| − | __NOTOC__ | + | |
| − | + | ||
== Configuring Default Nameservers in the Control Panel == | == Configuring Default Nameservers in the Control Panel == | ||
Revision as of 07:55, 5 September 2012
Configuring Default Nameservers in the Control Panel
Every domain registration requires a set of nameservers to be assigned to the domain name. To automate this process, a default set of nameservers can be configured in the Control Panel to have the system automatically assign these nameservers for every new domain registration. Existing domains can also be easily updated in bulk to use a configured default nameserver set.
- Login and navigate to "Manage Account > My Settings > Domain Settings > Nameserver Settings for new Domains" in the Control Panel
- Enter in the nameservers you wish to use as the automatic "default" nameservers for use with any new domain registration or existing domain name without a configured nameserver
- Please note every account uses a default set of nameservers regardless of whether this configuration has been set. The system will utilize the parent user's default nameservers, which for most cases will be HEXONET's default nameservers.
Registering domains using HEXONET's Nameservers
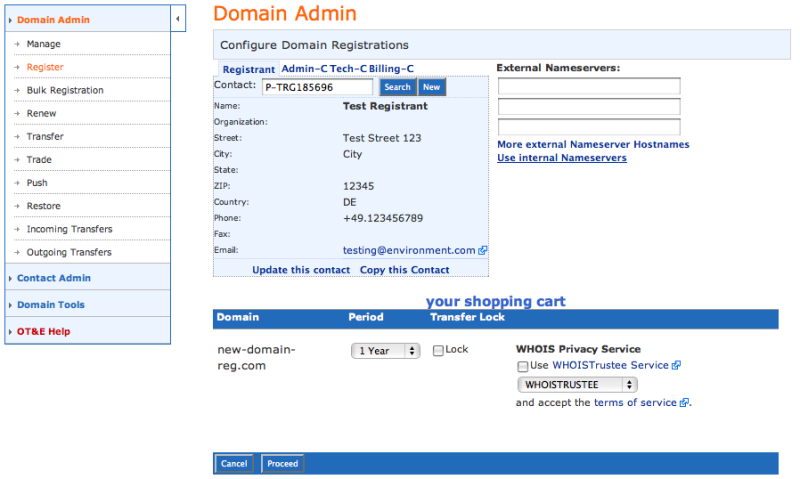
- If an account does not have a user configured default nameserver set, during any registration or configuration of a domain name, the system will offer HEXONET's nameservers as option - "Use Internal Nameservers"
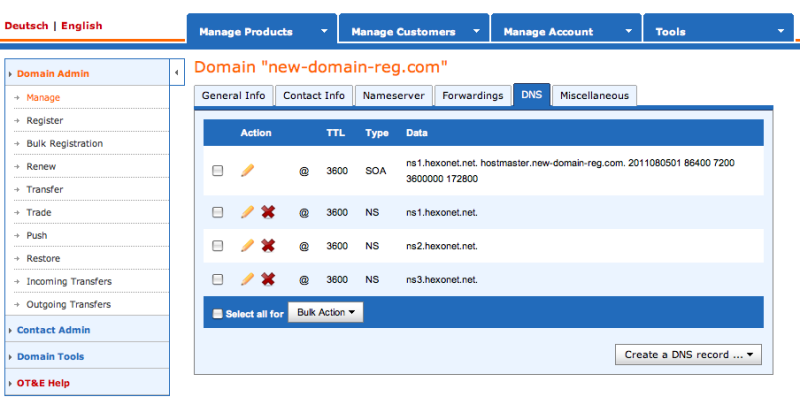
- Default nameservers automatically create standard DNS entries for a domain name upon registration. To edit or customize the DNS post registration, please navigate in the Control Panel to "Manage Products > Domains > Manage" and click on the domain name in question. Then click on the "Modify this domain" icon (pencil) and select the "DNS" tab.
Registering Domains Using HEXONET's Nameservers With Custom Hostnames
Information shortly available.
Registering Domains Using External Nameservers
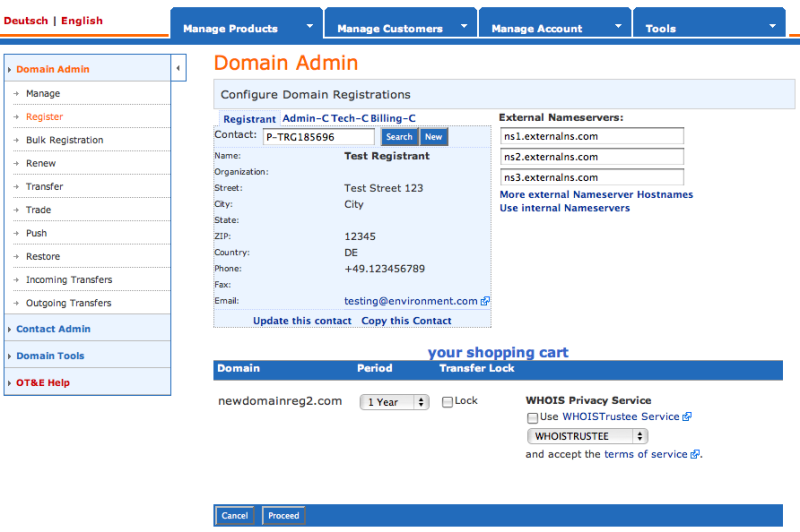
If you have a foreign DNS provider or maybe have your own DNS to use you can of course set the nameservers during the registration.
- Choose the option "Use external Nameservers" during the registration process, followed by the nameserver entries.
Using HEXONET's DNS for Existing Domains
Clients with their own Nameservers or have DNS services from another third party can choose enter in these "External" nameservers at registration.
- Navigate in the Control Panel to "Manage Products > Domains > Manage"
- Click on the domain name in question and then click on the "Modify this domain" icon (pencil)
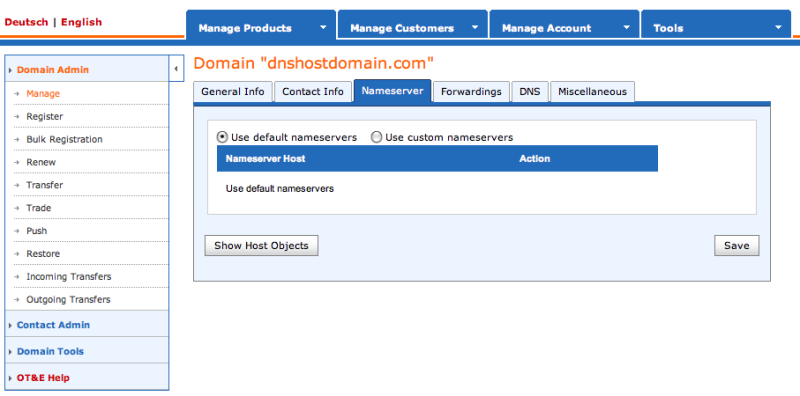
- Click the "Nameserver" tab and choose the option to "Use default nameservers"
HEXONET's Nameserver Set
ns1.hexonet.net
ns2.hexonet.net
ns3.hexonet.net
or alternatively
ns1.ispapi.net
ns2.ispapi.net
ns3.ispapi.net
Afterwards, please remember to adjust the NS records in the DNS zone so that they reflect HEXONET's Nameserver set.
Creating Custom Hostnames for HEXONET's DNS (using an existing domain)
Using IP addresses, there are two methods in which to create customized hostnames for HEXONET's DNS:
- Hosts Managed as Objects:
- In the Control Panel, navigate to "Manage Products > Domains > Manage"
- Click on the domain name in question and select the "Modify this domain" icon (pencil)
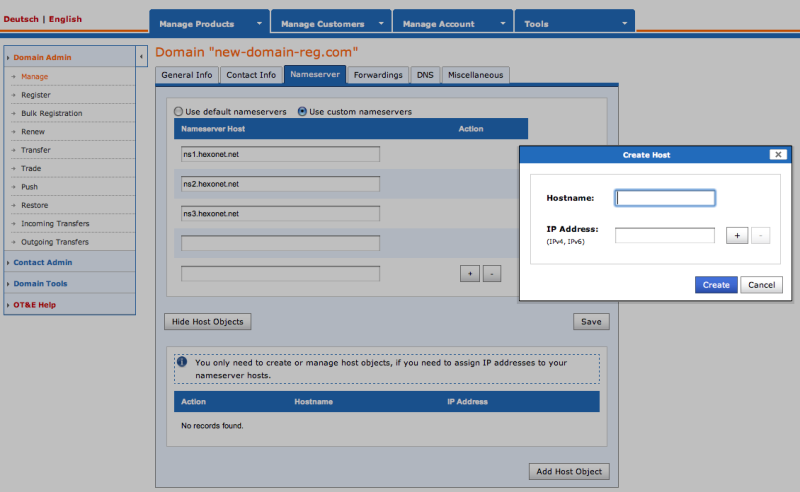
- Select the "Nameserver" tab and click "Show Host Objects" and then "Add Host Object".
- In the provided dialog window please enter in the desired hostname (e.g. ns1.yourdomain.net) followed by the respective IP address for a corresponding HEXONET nameserver. The standard IP addresses for HEXONET's nameservers are as follows:
- ns1: 194.50.187.134
- ns2: 194.0.182.1
- ns3: 193.227.117.124
- After creating the host objects you can assign the hostnames as nameservers to this and any other desired domain
- Hosts Managed as Attributes:
- In the Control Panel, navigate to "Manage Products > Domains > Manage"
- Click on the domain name in question and select the "Modify this domain" icon (pencil)
- Select the "Nameserver" tab
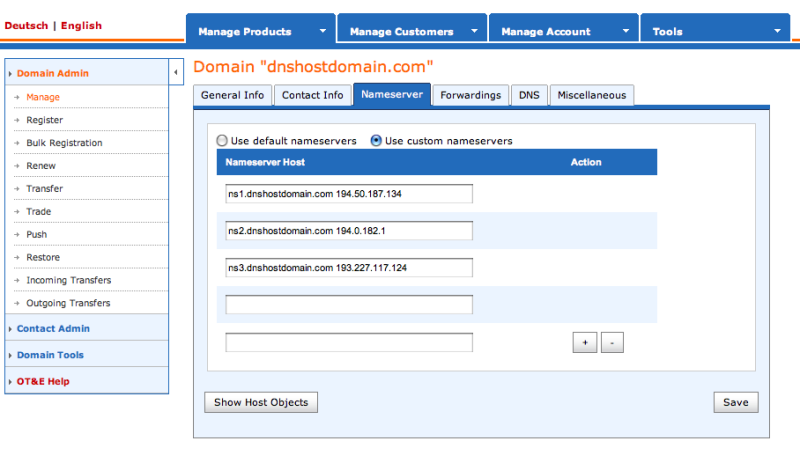
- Directly enter the desired hostname, followed by blankspace, followed by the IP address of a HEXONET corresponding nameserver (example: "ns1.yourdomain.net 194.50.187.134")
- Use the hostnames as the nameservers for any other domain.
Choosing External Nameservers for Existing Domains
- Navigate to "Manage Products > Domains > Manage"
- Click on the domain name in question and select the "Modify this domain" icon (pencil)
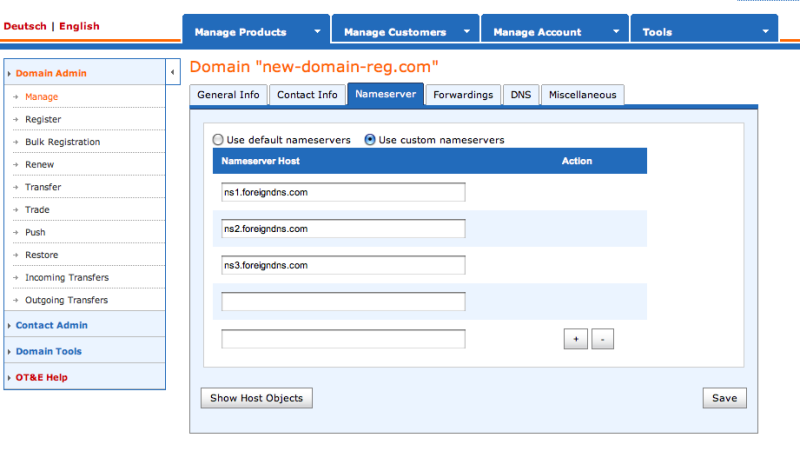
- Select the "Nameserver" tab and enter in the external nameservers hostnames.

