From HEXONET Wiki
(removed references to premium dns) |
m |
||
| Line 19: | Line 19: | ||
1. Go to Create new zone and click on Create DNS | 1. Go to Create new zone and click on Create DNS | ||
| − | [[File: | + | [[File:Createnewzone.png]] |
2. You have an option to either select from your domain list or provide the name of your DNS zone. Once done, click on Create. | 2. You have an option to either select from your domain list or provide the name of your DNS zone. Once done, click on Create. | ||
Revision as of 13:44, 2 August 2021
The following are information relating to HEXONET's DNS Service, including how to create and manage DNS zone, using HEXONET's DNS with your domain and DNSSEC support.
Contents |
DNS Service in the Control Panel
DNS Service consists of:
- DNS Dashboard - the main dashboard for your overall DNS Service
- DNS Zones - a list of all of your DNS zones
- Create new zone - go here to create a new DNS zone
Additionally, if you or your customers have Legacy DNS zones, you will see a Legacy DNS Zones option in your sidebar. Click here to learn more about Legacy DNS Zones.
DNS Use Case
Create new DNS zone with Basic DNS
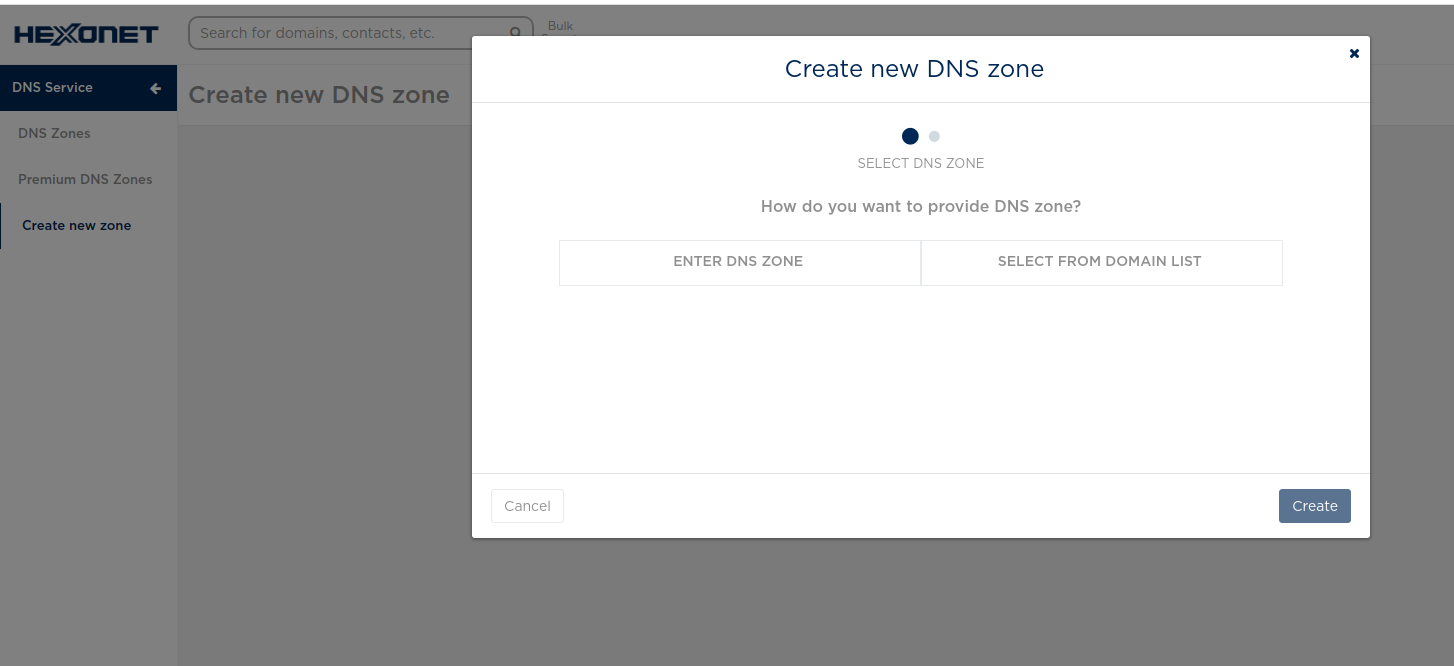
1. Go to Create new zone and click on Create DNS
2. You have an option to either select from your domain list or provide the name of your DNS zone. Once done, click on Create.
Add and manage records
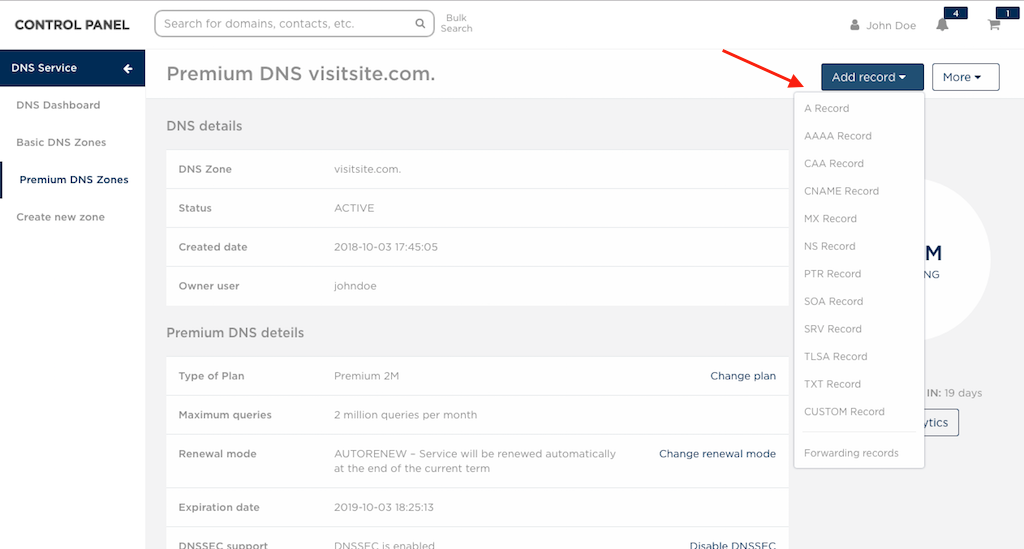
Go to Premium DNS Zones or Basic DNS Zones and click on Manage for the selected DNS zone. Click on the following button to add records.
Your existing record(s) is listed at the bottom of the details page.
Enable or disable DNSSEC
Go to Premium DNS Zones and click on Manage for the selected DNS zone. Click on the following button to enable or disable DNSSEC.
File:Dnssec.png

