From HEXONET Wiki
| (One intermediate revision by one user not shown) | |||
| Line 1: | Line 1: | ||
{{Sidebar}} | {{Sidebar}} | ||
| − | |||
| − | |||
| − | |||
<h1>How to create a CSR file with operating system LINUX</h1> | <h1>How to create a CSR file with operating system LINUX</h1> | ||
Latest revision as of 20:29, 19 March 2018
Contents |
How to create a CSR file with operating system LINUX
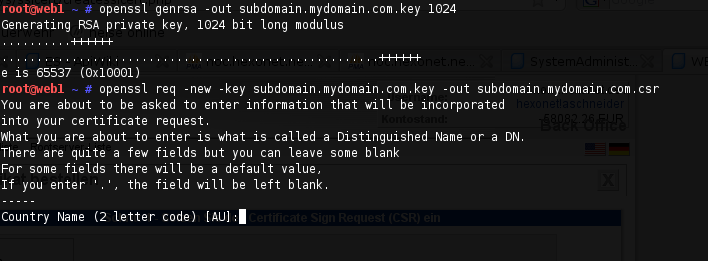
1. Creating a private key
In case of ordering a EV certificate, you should change the encryption to 2048 instead of 1024 bit.
2. Creating the CRS itself, based on the previous created private key.
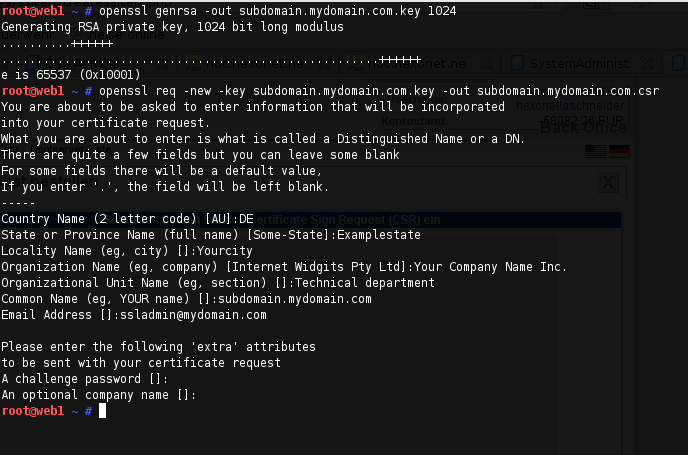
3. Adding required details completing the CSR
Please note that all fields are required, except of the extra attributes. When creating a CSR for a wildcard certificate, the value for Common Name should be *.mydomain.com instead of an expicit subdomain.mydomain.com.
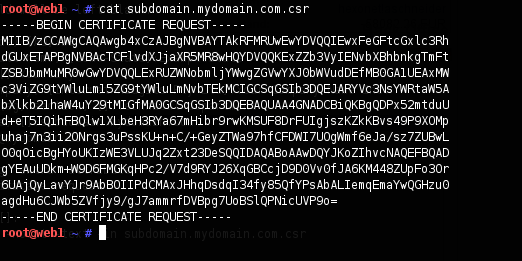
4. Reviewing the entered information
5. CSR file is ready
How to create a CSR file with operating system WINDOWS
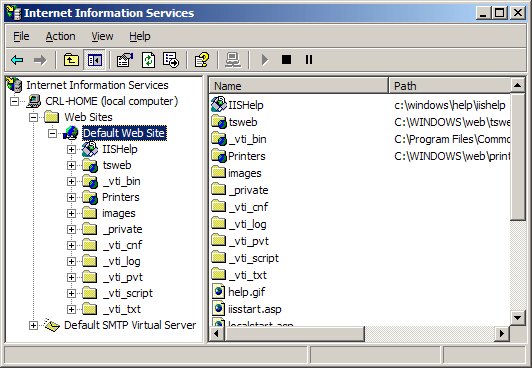
1. Select Administrative Tools.
2. Start Internet Services Manager.
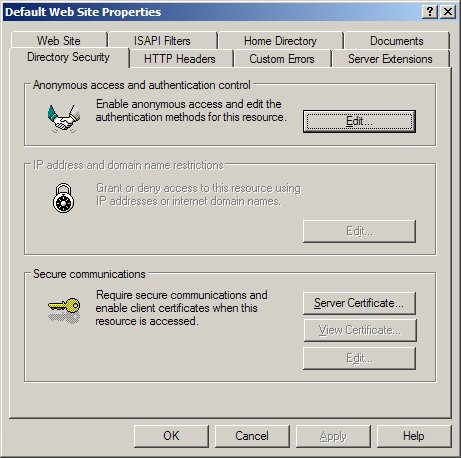
3. Open the properties window for the website the CSR is for. You can do this by right clicking on the Default Website and selecting Properties from the menu
4. Open Directory Security by right clicking on the Directory Security tab
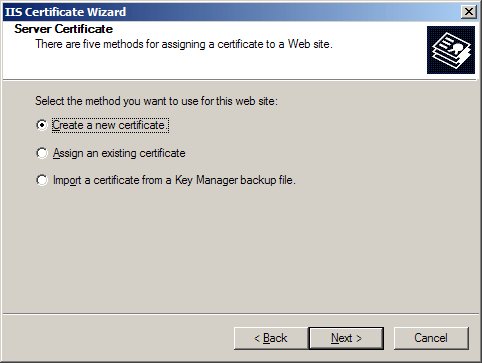
5. Click Server Certificate. The following Wizard will appear:
6. Click Create a new certificate and click Next.
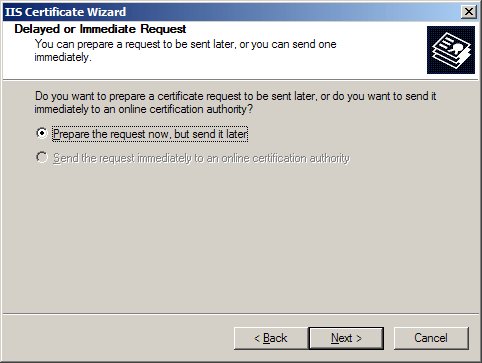
7. Select Prepare the request and click Next.
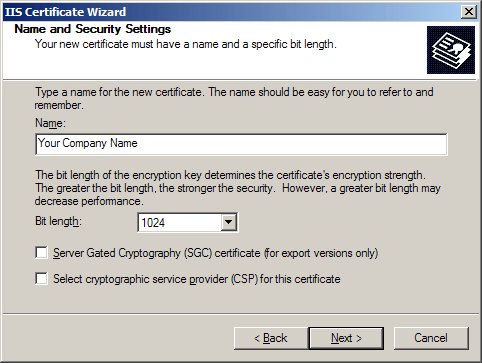
8. Provide a name for the certificate, this needs to be easily identifiable if you are working with multiple domains. This is for your records only.
9. If your server is 40 bit enabled, you will generate a 512 bit key. If your server is 128 bit you can generate up to 1024 bit keys. We recommend you stay with the default of 1024 bit key if the option is available. Click Next
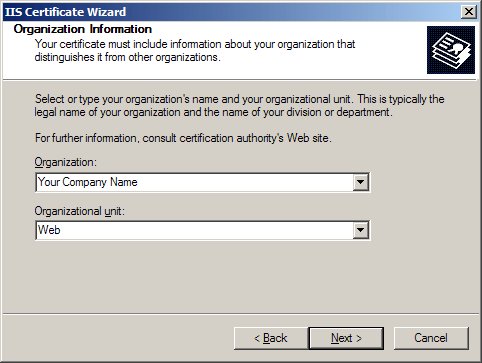
10. Enter Organisation and Organisation Unit, these are your company name and department respectively. Click Next.
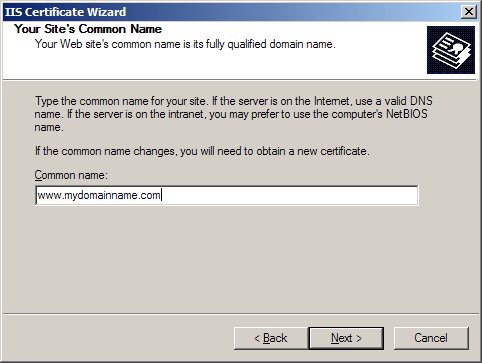
11. The Common Name field should be the Fully Qualified Domain Name (FQDN) or the web address for which you plan to use your IIS SSL Certificate, e.g. the area of your site you wish customers to connect to using SSL. Click Next.
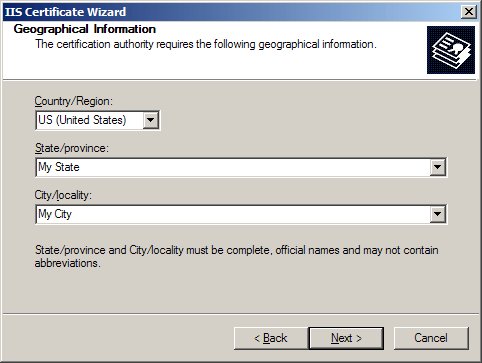
12. Enter your country, state and city. Click Next.
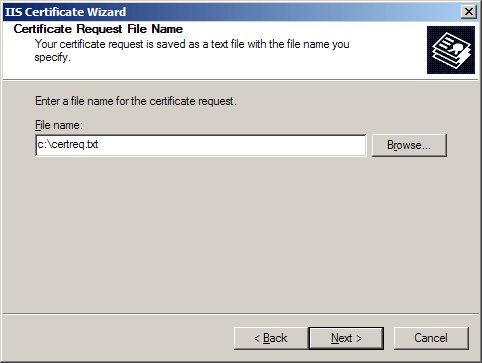
13. Enter a filename and location to save your CSR. You will need this CSR to enroll for your IIS SSL Certificate. Click Next.
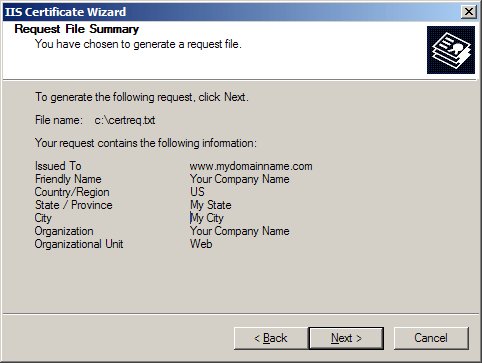
14. Check the details you have entered. If you have made a mistake click Back and amend the details. Be especially sure to check the domain name the Certificate is to be "Issued To". Your IIS SSL Certificate will only work on this domain. Click Next when you are happy the details are absolutely correct.
15. When you make your application, make sure you include the CSR in its entirety into the appropriate section of the enrollment form - including
-----BEGIN CERTIFICATE REQUEST-----
to
-----END CERTIFICATE REQUEST-----
16. Click Next
17. Confirm your details in the enrollment form
To save your private key
1. Go to: Certificates snap in in the MMC
2. Select Requests
3. Select All tasks
4. Select Export

